How To Create Your Own Crochet Hand Bag!

Crocheting your own handbag is a rewarding and fashionable way to express your creativity. Whether you’re a seasoned crocheter or just getting started, this detailed guide will walk you through the process of creating a stylish, functional crochet handbag. Plus, we’ve included a free pattern to make your crafting journey even easier.
Materials You’ll Need
Before you begin, gather the following materials:
- Yarn: Choose a sturdy yarn that suits your style. Cotton or acrylic yarns are ideal for handbags.
- Crochet Hook: The size will depend on your yarn choice, but a 4.0mm (G) to 5.5mm (I) hook is commonly used.
- Scissors: For cutting yarn.
- Tapestry Needle: To weave in ends and sew parts together.
- Stitch Markers: Optional but helpful for keeping track of your rounds.
- Lining Fabric and Sewing Supplies: Optional for a professional finish.
Understanding Basic Stitches
If you’re new to crochet, familiarize yourself with these basic stitches:
- Chain (ch): The foundation of most crochet projects.
- Slip Stitch (sl st): A stitch used to join and finish pieces.
- Single Crochet (sc): A dense and sturdy stitch, perfect for handbags.
- Half Double Crochet (hdc): Adds height to your stitches without being too open.
- Double Crochet (dc): Creates a looser fabric, often used in decorative patterns.
Step-by-Step Instructions
1. Create the Base
Start by crocheting the base of your handbag. This will be an oval shape.
Pattern:
- Chain 31.
- Round 1: Sc in the second chain from the hook and in each chain across. When you reach the last chain, work 3 sc into it to turn the corner. Continue to sc in each chain on the opposite side. When you reach the last chain, work 2 sc into it to complete the round. (62 sc)
- Round 2: Sc in the first sc, then 2 sc in the next sc. Sc in the next 28 sc, then 2 sc in the next sc. Sc in the next sc, then 2 sc in the next sc. Sc in the next 28 sc, then 2 sc in the next sc. Join with a sl st to the first sc. (66 sc)
- Round 3: Sc in the first 2 sc, then 2 sc in the next sc. Sc in the next 28 sc, then 2 sc in the next sc. Sc in the next 2 sc, then 2 sc in the next sc. Sc in the next 28 sc, then 2 sc in the next sc. Join with a sl st to the first sc. (70 sc)
Continue increasing in this manner until your base reaches the desired size, typically around 5-6 inches wide.
2. Build the Body
Once the base is complete, work on the body of the bag.
Pattern:
- Round 1: Ch 1, sc in each stitch around. Join with a sl st to the first sc.
- Repeat Round 1 until the body of the bag reaches your desired height, usually around 10-12 inches.
Feel free to incorporate different stitches or patterns to add texture and design. For example, alternating rows of sc and dc can create a beautiful pattern.
3. Create the Handles
Decide whether you want short handles or a longer strap for a crossbody bag.
Pattern for Handles:
- Attach yarn to the desired starting point on the top edge of the bag.
- Chain the length you want for your handle or strap.
- Attach the other end to the opposite side of the bag.
- Sc back across the chain to reinforce the handle.
- Secure with a sl st and fasten off.
Repeat this process for the other handle if you’re making two short handles.
4. Add the Lining (Optional)
For a professional finish, add a fabric lining to your bag.
- Cut a piece of fabric slightly larger than your bag.
- Fold and sew the edges to prevent fraying.
- Insert the lining into the bag and sew it in place using a needle and thread.
Tips for Customization
- Colors: Experiment with different color combinations for a unique look.
- Stitches: Incorporate textured stitches like bobbles or clusters.
- Embellishments: Add buttons, beads, or embroidery for extra flair.
Creating your own crochet handbag is a fun and fulfilling project that results in a beautiful, personalized accessory. With this guide and free pattern, you have everything you need to get started. So grab your hook and yarn, and start crocheting your new favorite handbag today!

Cacao Smoothie Bowls
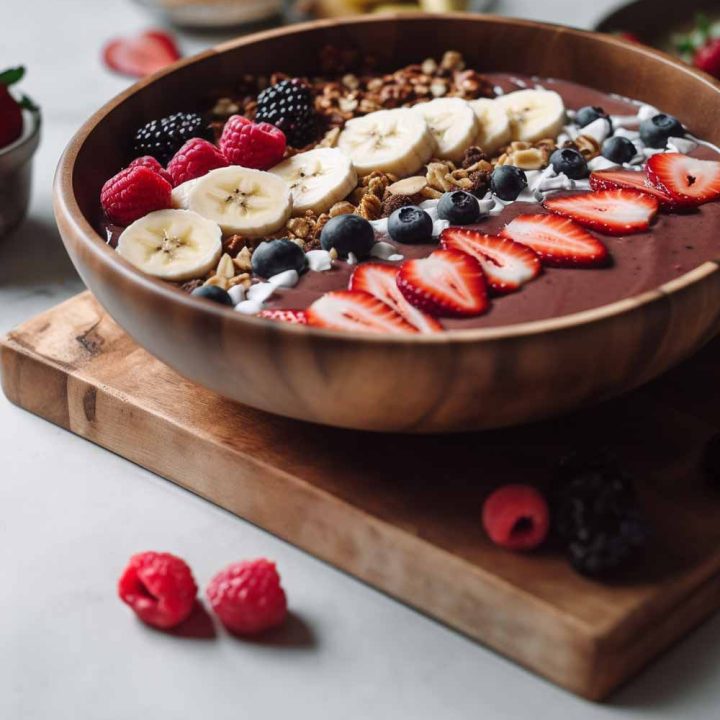
This Cacao Smoothie Bowl is a rich and creamy breakfast treat that’s packed with nutrients. Made with frozen bananas, cacao powder, and your choice of milk, it’s perfect for busy mornings and is easily customizable with your favorite toppings.
Ingredients
- 2 frozen bananas
- 2 tablespoons cacao powder
- 1/2 cup almond milk (or any milk of your choice)
- 1 tablespoon honey or maple syrup (optional, for sweetness)
- Toppings: fresh fruit, granola, nuts, seeds, coconut flakes
Instructions
- Blend the Base: In a high-speed blender, combine frozen bananas, cacao powder, and almond milk. Blend until smooth and creamy, adjusting the liquid as needed for desired thickness.
- Sweeten (Optional): Taste the smoothie and add honey or maple syrup if you prefer it sweeter. Blend again to incorporate.
- Serve & Top: Pour the thick smoothie into bowls. Top with your favorite fruits, granola, nuts, or any other preferred toppings.
- Enjoy Immediately: For the best texture, serve the smoothie bowls right away.

More interesting articles you may be interested in reading:

