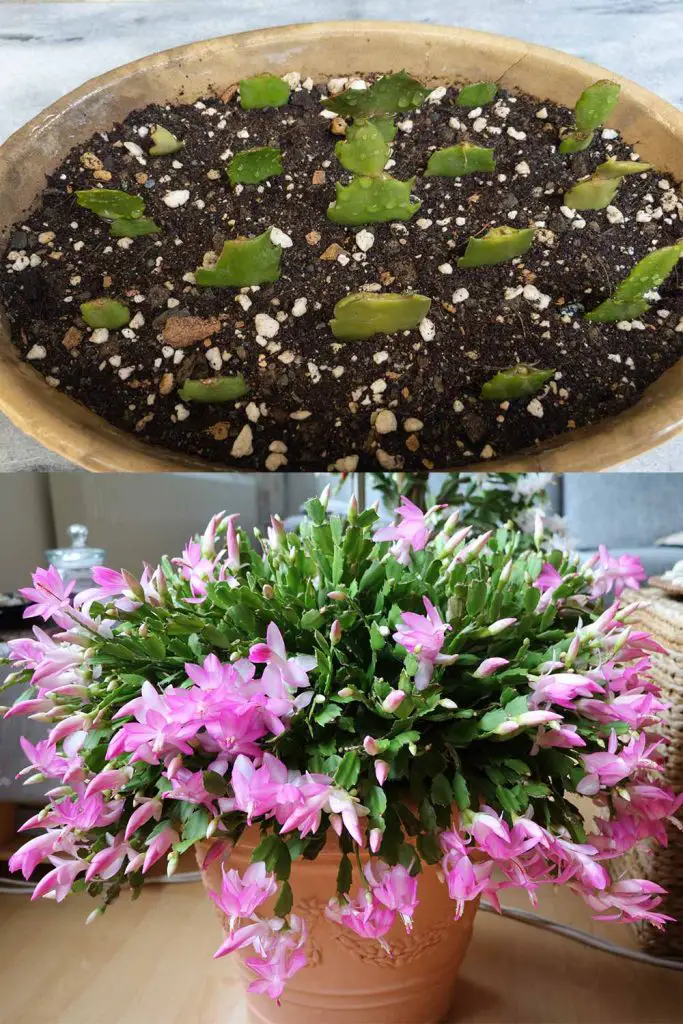
How To Take The Best Christmas Cactus Cuttings!

The holiday season is just around the corner, and what better way to celebrate than by propagating your Christmas cactus and sharing the joy with friends and family? Taking cuttings from your Christmas cactus is a fantastic way to create new plants or pass along this beloved holiday symbol.
In this comprehensive guide, we’ll walk you through the process, step by step, ensuring that you get the best results. From selecting the right equipment to nurturing your cuttings into healthy, vibrant plants, we’ve got you covered.
So, let’s get started on your journey to successfully taking the best Christmas cactus cuttings!
Choosing the Right Time
Timing is crucial when it comes to taking Christmas cactus cuttings. The best time to do this is typically in the late spring or early summer. During this period, your cactus is in an active growth phase, making it more likely that cuttings will root successfully. Avoid taking cuttings during the dormant winter months or when the plant is blooming, as these times may yield less favorable results.
Selecting the Appropriate Equipment
Before you start taking cuttings, it’s essential to gather the necessary equipment. Here’s what you’ll need:
- Pruning shears or sharp scissors
- A clean, sterilized knife
- A clean, sterile cutting board
- Small pots or containers
- Well-draining potting mix
- A spray bottle filled with water
- Rooting hormone (optional)
- Plastic bags or a humidity dome
Identifying Healthy Parent Plants
Healthy parent plants are the foundation for successful Christmas cactus cuttings. Look for the following signs to identify a robust parent plant:
- Vibrant, green foliage
- No signs of disease or pests
- Well-developed segments with at least three leaf sections
- A bushy appearance with numerous leaves
Preparing Your Workspace
Create a clean and organized workspace to ensure the success of your cutting process. Sterilize your cutting tools and containers using rubbing alcohol or a bleach solution to prevent the transfer of diseases. Having everything ready and within reach will make the process smoother and more efficient.
Taking the Cuttings
To take cuttings from your Christmas cactus, follow these steps:
- Select a healthy, mature segment of the cactus with at least three leaf sections.
- Use your clean, sterilized shears or knife to make a clean cut, leaving a clean edge.
- Allow the cuttings to air dry for about an hour. This step helps prevent rotting.
Rooting Hormone Application
While not mandatory, using a rooting hormone can increase your chances of success. Simply dip the cut end of the Christmas cactus cutting into the rooting hormone powder before planting it in the potting mix. This can encourage quicker root development.
Preparing the Potting Mix
Christmas cacti thrive in well-draining potting mixtures. You can create your mix by combining equal parts of perlite, potting soil, and sand. Ensure the mix is moist but not soggy.
Planting the Cuttings
Gently insert the cuttings into the prepared potting mix, burying them about 1-2 inches deep. Space the cuttings at least an inch apart to provide room for root growth. Water the cuttings lightly to settle the soil around them.
Creating a Mini Greenhouse
To boost humidity and create a favorable environment for root development, cover the pots with plastic bags or a humidity dome. This helps prevent moisture loss and maintains a consistent humidity level around the cuttings.
Providing Adequate Light and Temperature
Place your cuttings in a location with indirect sunlight or bright, filtered light. Ensure the temperature remains between 65°F to 75°F (18°C to 24°C) for optimal root growth. Avoid exposing them to direct sunlight, which can scorch the cuttings.
Watering and Humidity
Maintaining the right moisture levels is crucial. Water the cuttings when the top inch of the potting mix feels dry, ensuring not to overwater as this can lead to rot. Mist the cuttings regularly to maintain humidity inside the covering.
Monitoring and Patience
It’s essential to be patient during the rooting process. It can take several weeks to several months for Christmas cactus cuttings to develop strong roots. Keep an eye on them, watching for any signs of rot or pests.
Transplanting
Once your cuttings have developed a robust root system and have grown a few inches, it’s time to transplant them into individual pots. Use a standard cactus or succulent potting mix, and give each cutting its space to grow.
Caring for Established Plants
Congratulations, you now have thriving Christmas cactus plants! Continue caring for them by providing the right light, temperature, and watering regimen. As they grow, you can enjoy their beautiful blooms during the holiday season.

More interesting articles you may be interested in reading:

How To Remove A Tree Stump Painlessly
10 Vital Home Maintenance Tasks You’ll Regret If You Forget
See How Much Propane Is Left In A Tank With No Gauge
Thanks for reading and be sure to share this info with your friends using the social share buttons below.
Talking about social stuff, consider liking our Facebook page to keep up to date with our articles. Check out our other articles for more mental scoops!
