How To Take Your Wandering Dude Cuttings And Propagate Them!

The Wandering Dude, also known as Tradescantia, is a popular houseplant known for its striking foliage and easy care requirements. Propagating this plant is not only a rewarding process but also a fantastic way to share its beauty with friends and family.
In this guide, we’ll delve into the detailed steps of taking cuttings from your Wandering Dude and propagating them successfully. Let’s get started!
Understanding Your Wandering Dude
Before you dive into propagation, it’s crucial to know a bit about the plant you’re working with. The Wandering Dude, or Tradescantia, is a genus of plants with vibrant, often variegated leaves.
They thrive in bright, indirect light and prefer a bit of humidity. These plants are versatile and can grow in soil or water, making them an excellent choice for propagation.
When to Take Cuttings
Timing is essential when taking cuttings from your Wandering Dude. The best time to do this is during the growing season, typically spring and early summer.
During this period, the plant is actively growing, which increases the chances of successful propagation. However, with the right care, cuttings can be taken at any time of the year.
Gathering Your Supplies
To propagate your Wandering Dude, you’ll need a few basic supplies:
- Sharp scissors or pruning shears
- A clean container filled with water or a pot with fresh potting soil
- A rooting hormone (optional but recommended for soil propagation)
- A clear plastic bag or plastic wrap (for creating a humidity dome)
Taking the Cuttings
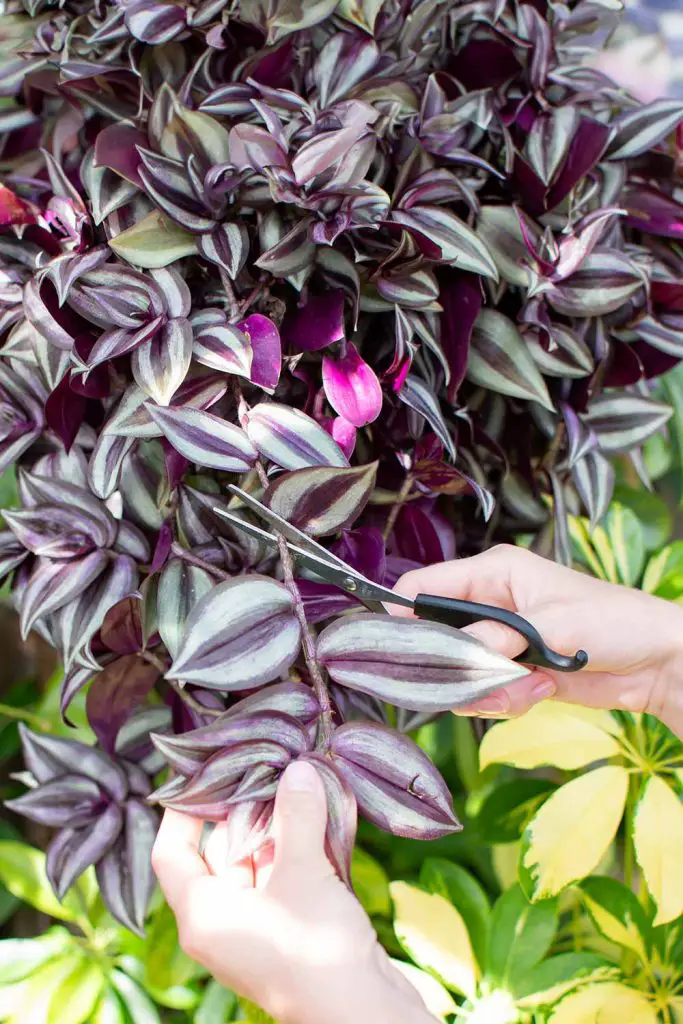
Select healthy, vibrant stems from your Wandering Dude. Look for stems that are about 4-6 inches long with at least a few sets of leaves.
Using your scissors or pruning shears, make a clean cut just below a node (the point where leaves attach to the stem). Nodes are crucial as they contain the cells needed for root development.
Preparing the Cuttings
Once you have your cuttings, remove the leaves from the bottom half of the stem. This step is vital as it prevents the leaves from rotting in water or soil. If you’re using a rooting hormone, dip the cut end of the stem into the hormone powder. This can help speed up the rooting process and improve success rates.
Propagating in Water
For water propagation, place the cuttings in a container filled with water. Ensure that the nodes are submerged while keeping the leaves above water.
Place the container in a spot with bright, indirect light. Change the water every few days to keep it fresh and oxygenated. Within a week or two, you should see roots beginning to form.
Propagating in Soil
If you prefer soil propagation, fill a small pot with fresh potting soil. Make a hole in the soil and gently insert the cutting, ensuring that at least one node is buried. Water the soil lightly and cover the pot with a clear plastic bag or wrap to create a humid environment.
Place the pot in a location with bright, indirect light. Check the soil regularly to keep it moist but not waterlogged.
Caring for Your New Plants
As your cuttings develop roots, you’ll need to adjust their care to ensure healthy growth. For water-propagated cuttings, transfer them to soil once the roots are a few inches long. For soil-propagated cuttings, remove the humidity cover once new growth appears.
Continue to provide bright, indirect light and keep the soil consistently moist.
Troubleshooting Common Issues
Propagation isn’t always foolproof, and you might encounter some issues along the way. Here are a few common problems and solutions:
- Yellowing Leaves: This can indicate overwatering or poor water quality. Ensure you’re changing the water regularly and not overwatering soil-propagated cuttings.
- No Root Growth: If roots aren’t forming, check that the nodes are submerged or properly buried in soil. Using a rooting hormone can also help.
- Mold or Rot: Remove any rotting leaves or stems and ensure adequate air circulation. For soil propagation, make sure the soil isn’t too wet.
Propagating Wandering Dude cuttings is a straightforward and gratifying process that allows you to expand your plant collection or share with others. By understanding the plant’s needs and following these detailed steps, you’ll have thriving new Tradescantia plants in no time. Happy gardening!

More interesting articles you may be interested in reading:

